


Set Up Your Tide Clock
2. Enter Setup Mode
Press and hold the button on the tide clock for 5 seconds until clock enters "WIFI SETUP" mode
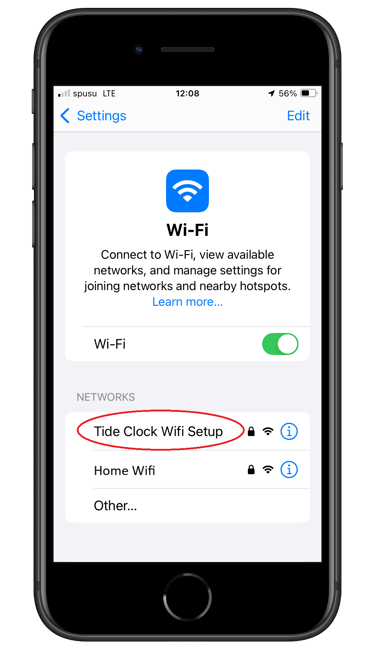
3. Connect to the WiFi setup portal
On your phone or computer:
Open WiFi settings
Look for a network named “Tide Clock WiFi Setup”
Connect to it using the password: “tideclock”
A setup page should automatically open
If this doesn’t happen, go to your browser and enter: 192.168.4.1
If you still can’t get to the WiFi setup page, power the clock off and on and try again or try using another device
4. Choose Your Home WiFi
On the setup page:
Select your home WiFi network
Enter your home WiFi password
Select “Connect” - The clock will automatically reboot and connect to your Wi-Fi. This can take a couple of minutes.
1. Power On the Tide Clock
Plug in the tide clock to turn it on.
Wait until you see Error 01 / NO WIFI on the displays
5. Change Tide Clock settings
In a web browser on your phone or computer - visit tidedials.co.uk/setup
A login page will be displayed
Enter the Serial number and Password which you can find engraved on the back of your tide clock or in the Quick Set-up Guide that came with your tide clock
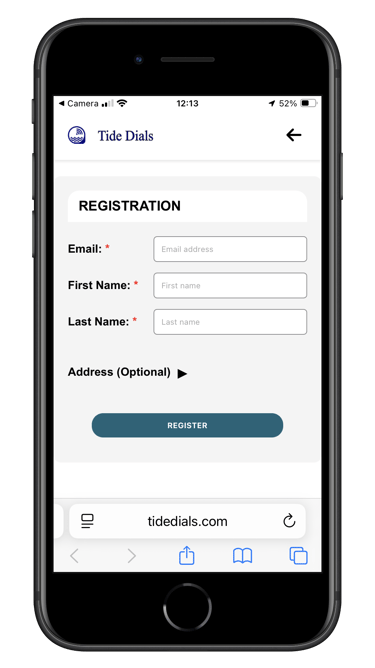
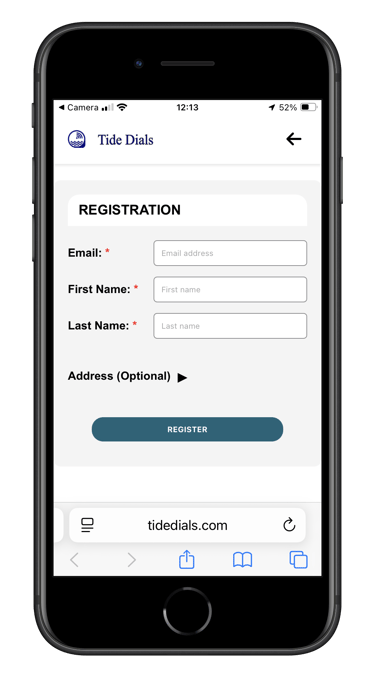
Note: If this is the first time you have set-up your location you will be asked to register your tide clock
Register your details then you will be sent an email to verify the email address you have entered
Open the email in your inbox and select the button "Verify email"
You will automatically be sent to the page where you can select your Tide Station
Select your preferred tide station using the Set Nearest Tide Station
From the dashboard you can also change other settings for your tide clock and manage your subscription
Unplug the clock and plug in again to update the displays to the newly selected tide station. This may take a couple of minutes
TideDials
info@tidedials.com